

How to Use the Work Sharp Knife Sharpener Safely and Effectively


Short answer
Learn how to use the Work Sharp knife sharpener step by step, avoid common mistakes, and choose the right setup for kitchen, outdoor, and retail buyers.
In this article
- 01 What makes a Work Sharp sharpener easy to use
- 02 Before you sharpen: a quick setup that saves time
- 03 Check these basics first
- 04 How to use the Work Sharp knife sharpener step by step
- 05 Common mistakes that reduce performance
- 06 Choosing the right setup for home users and wholesale buyers
- 07 How to keep the edge sharp longer
- 08 Practical FAQ
- 09 How often should I use a Work Sharp knife sharpener?
- 10 Can it sharpen every knife?
- 11 Should I start with the coarsest abrasive?
- 12 What is the biggest mistake beginners make?
- 13 Is this a good option for retail customers?
- 14 Final thoughts
The easiest way to use a Work Sharp knife sharpener is to start with a clean, stable blade, choose the right grit or guide for your knife, and make light, even passes without forcing the edge. Whether you are sharpening kitchen cutlery, pocket knives, or display inventory for your shop, the goal is the same: remove just enough metal to restore a sharp edge while keeping the blade angle consistent and the process safe.
If you are new to sharpening, Work Sharp systems are popular because they help reduce guesswork. They are designed to guide the blade at a repeatable angle, which makes them useful for home users and also for retailers, resellers, and distributors who want a product that customers can understand quickly. The key is not speed. The key is control.
What makes a Work Sharp sharpener easy to use
Work Sharp sharpeners are built around guided sharpening, which means the user does not have to freehand every stroke. That matters because most dull edges are caused by normal wear, minor rolling, or small nicks—not by major damage. A guided system helps bring the edge back with less trial and error.
For many buyers, the appeal is practical:
- Consistent angle control for better results with less experience
- Multiple abrasive options for sharpening, refining, and finishing
- Fast setup for everyday maintenance
- Broad use case across kitchen, outdoor, and EDC-style knives
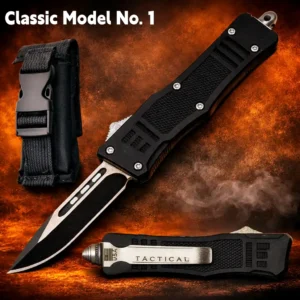
That versatility also makes the sharpener attractive in retail settings. Customers often want one tool that feels approachable, and a guided system is easier to explain than a traditional bench stone setup. For shops carrying blades and accessories, pairing sharpening tools with inventory from the OTF and automatic knife category can help create a more complete knife-care offering for customers who want maintenance products alongside their purchases.
Before you sharpen: a quick setup that saves time
Before using the sharpener, inspect the knife carefully. A good sharpening session starts with a realistic assessment of the edge. If the blade is only slightly dull, you may only need a fine abrasive or finishing pass. If the edge is rolled or has small chips, start more aggressively and work down gradually.
Check these basics first
- Clean the blade so dirt, oil, or residue does not interfere with the abrasive
- Inspect for damage such as chips, bends, or heavy corrosion
- Identify the blade type so you can choose the right guide and pressure
- Secure a stable work area with good lighting and no distractions
It also helps to review the manufacturer’s instructions for your specific Work Sharp model. Different models may use belts, wheels, angle guides, or fixed-angle systems, and the correct setup can vary. If you are buying for a store or distribution channel, it is worth checking which models are easiest for customers to learn quickly and which replacement abrasives are easiest to stock.
How to use the Work Sharp knife sharpener step by step
The exact motions depend on the model, but the basic process is similar across most Work Sharp sharpeners. The goal is to keep the blade aligned with the guide and use controlled, repeatable passes.
- Choose the right abrasive or guide setting. Start with the coarsest option only if the knife is truly dull or has visible edge damage. For routine maintenance, a medium or fine setting is often enough.
- Position the knife correctly. Place the blade in the guide or against the sharpening surface as directed by the tool design. Keep your fingers clear of the edge.
- Use light, even pressure. Let the abrasive do the work. Pressing too hard can remove too much metal and shorten blade life.
- Make smooth passes. Move the blade steadily through the sharpening path or across the abrasive surface. Consistency matters more than speed.
- Work both sides evenly. Match the number of passes on each side so the edge stays centered.
- Refine the edge. After the primary sharpening stage, use a finer grit or finishing step to improve cutting feel and reduce burrs.
- Test carefully. Check the edge on paper, cardboard, or another safe test material rather than using your hand.
If the knife still feels rough after the first round, do not immediately force more pressure. Instead, return to the previous grit and make a few more controlled passes. Many sharpening problems come from impatience rather than the tool itself.
Common mistakes that reduce performance
Even a good sharpener can produce poor results if it is used carelessly. These are the most common mistakes to avoid:
- Using too much pressure and wearing the blade unevenly
- Skipping grits and leaving a rough edge behind
- Sharpening at inconsistent angles when the knife is not seated properly
- Over-sharpening a blade that only needed maintenance
- Ignoring burr removal and leaving the edge feeling sharp but weak
- Sharpening dirty or damaged blades without inspection first
Another frequent issue is trying to fix a heavily damaged edge in one session. If a knife has deep chips or severe wear, it may take more time and more abrasive stages than a routine touch-up. In a retail environment, it helps to explain the difference between maintenance sharpening and repair sharpening so customers know what to expect.
Choosing the right setup for home users and wholesale buyers
Not every buyer needs the same sharpener configuration. A home cook may want a simple guided tool, while a store buyer may care more about durability, replacement parts, and ease of explanation. When comparing options, consider the following:
- Blade variety: Will customers sharpen kitchen knives, outdoor knives, or both?
- Learning curve: Can a first-time user get good results without frustration?
- Consumables: Are replacement belts, stones, or abrasives easy to reorder?
- Storage and display: Does the product fit your shelf, counter, or e-commerce presentation?
- Customer support: Are instructions clear enough to reduce returns and complaints?
For wholesale buyers, these details matter because the best-selling sharpener is often the one that produces reliable results and is simple to explain. That is why many resellers look for tools with a strong balance of performance and usability. If you are sourcing sharpening products for your store or distribution network, you can also use the wholesale inquiry form to ask about availability, case quantities, and product combinations that fit your customer base.
How to keep the edge sharp longer
Sharpening is only part of the process. Good edge retention starts with everyday use and storage. A sharp knife will stay sharp longer if it is used correctly and maintained regularly.
- Hand wash and dry promptly when appropriate for the blade material and manufacturer guidance
- Store safely in a sheath, block, drawer insert, or protected display setup
- Use the right cutting surface to avoid unnecessary wear
- Touch up early instead of waiting until the edge is badly dulled
For knives sold through retail channels, this is a useful value-add topic. Customers who understand basic maintenance are more likely to be satisfied with their purchase and more likely to return for accessories, replacements, or upgrades.
Practical FAQ
How often should I use a Work Sharp knife sharpener?
That depends on use. A kitchen knife used daily may need light maintenance more often than an occasional-use outdoor knife. The best approach is to sharpen when cutting performance drops, rather than waiting until the edge is severely dull.
Can it sharpen every knife?
Not every blade is a perfect match for every sharpener. Always check the model’s guidance for blade shape, size, and edge type. Specialty blades, serrations, or unusual profiles may require different care.
Should I start with the coarsest abrasive?
Only if the blade needs real restoration. For routine maintenance, starting too coarse can remove more metal than necessary. A finer starting point is usually better for a blade that is still in decent condition.
What is the biggest mistake beginners make?
Pressing too hard. Light, controlled passes usually give better results and help protect the blade.
Is this a good option for retail customers?
Yes, especially when your customers want a guided, straightforward sharpening tool. It is easy to demonstrate, easy to explain, and practical for a wide range of knife owners.
Final thoughts
Using a Work Sharp knife sharpener comes down to patience, consistency, and matching the abrasive to the condition of the blade. Start with a clean knife, use light pressure, keep the angle steady, and finish by refining the edge rather than rushing the process. With the right technique, you can restore a sharp, dependable edge without unnecessary wear.
For shoppers, that means better cutting performance and safer handling. For retailers and wholesale buyers, it means a product category that is easy to merchandise, easy to explain, and useful across a wide range of customers. When you pair the right sharpener with the right knife selection and clear care guidance, you create a better buying experience from the start.